Apple iPhone 14 Plus Taptic Engine
Before You Begin
Warning
Read Battery Safety and follow workspace and battery handling guidelines before you begin.
Remove the following part before you begin:
Tools
-
6.7-inch repair tray
-
ESD-safe tweezers
-
JCIS bit
-
Nylon probe (black stick)
-
Super screw bit
-
Torque driver (blue, 0.65 kgf cm)
-
Torque driver (orange, 0.85 kgf cm)
-
Torque driver (teal, 0.75 kgf cm)
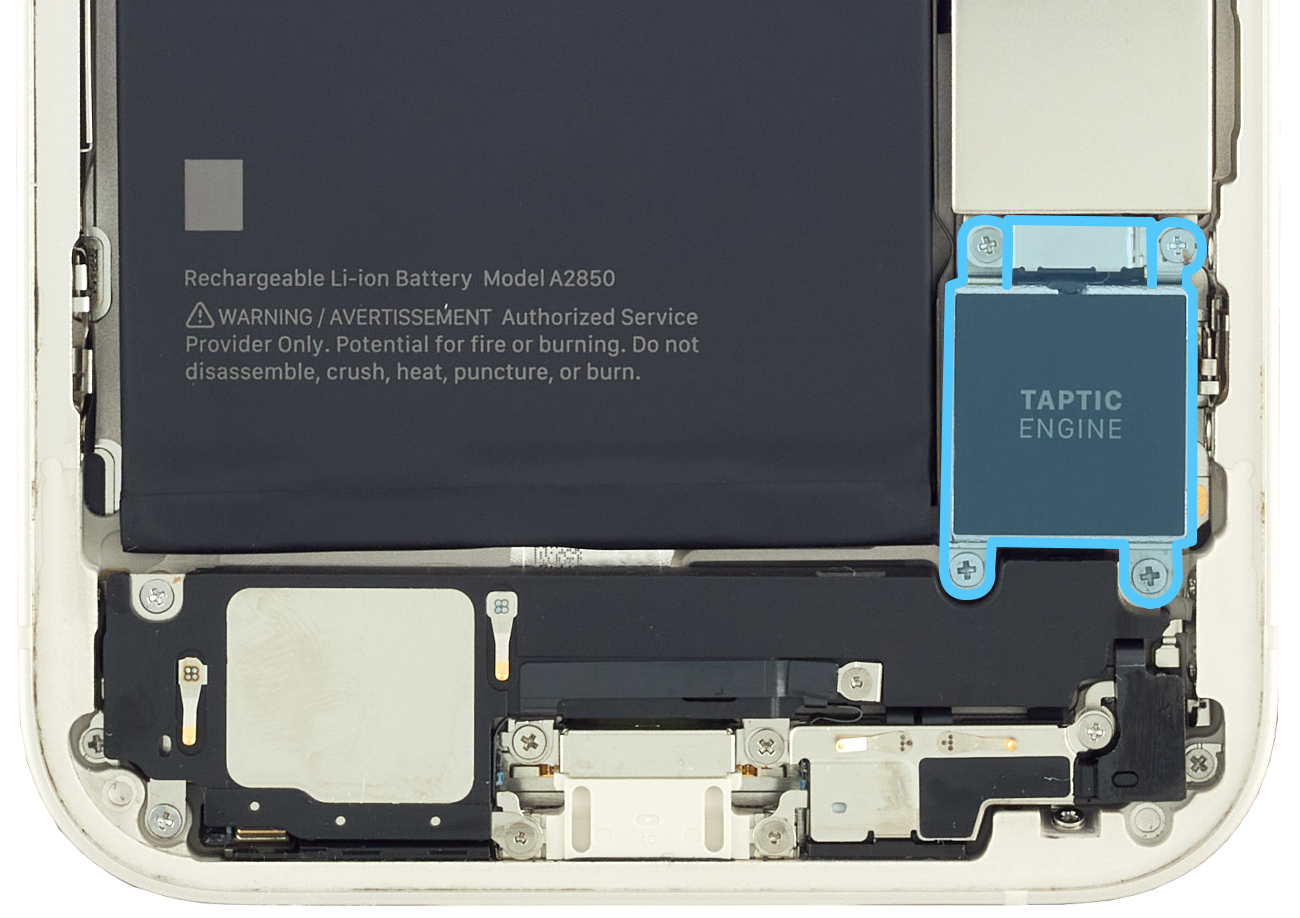
Removal
-
Place the enclosure in the repair tray with the Lightning connector facing the cutout.
-
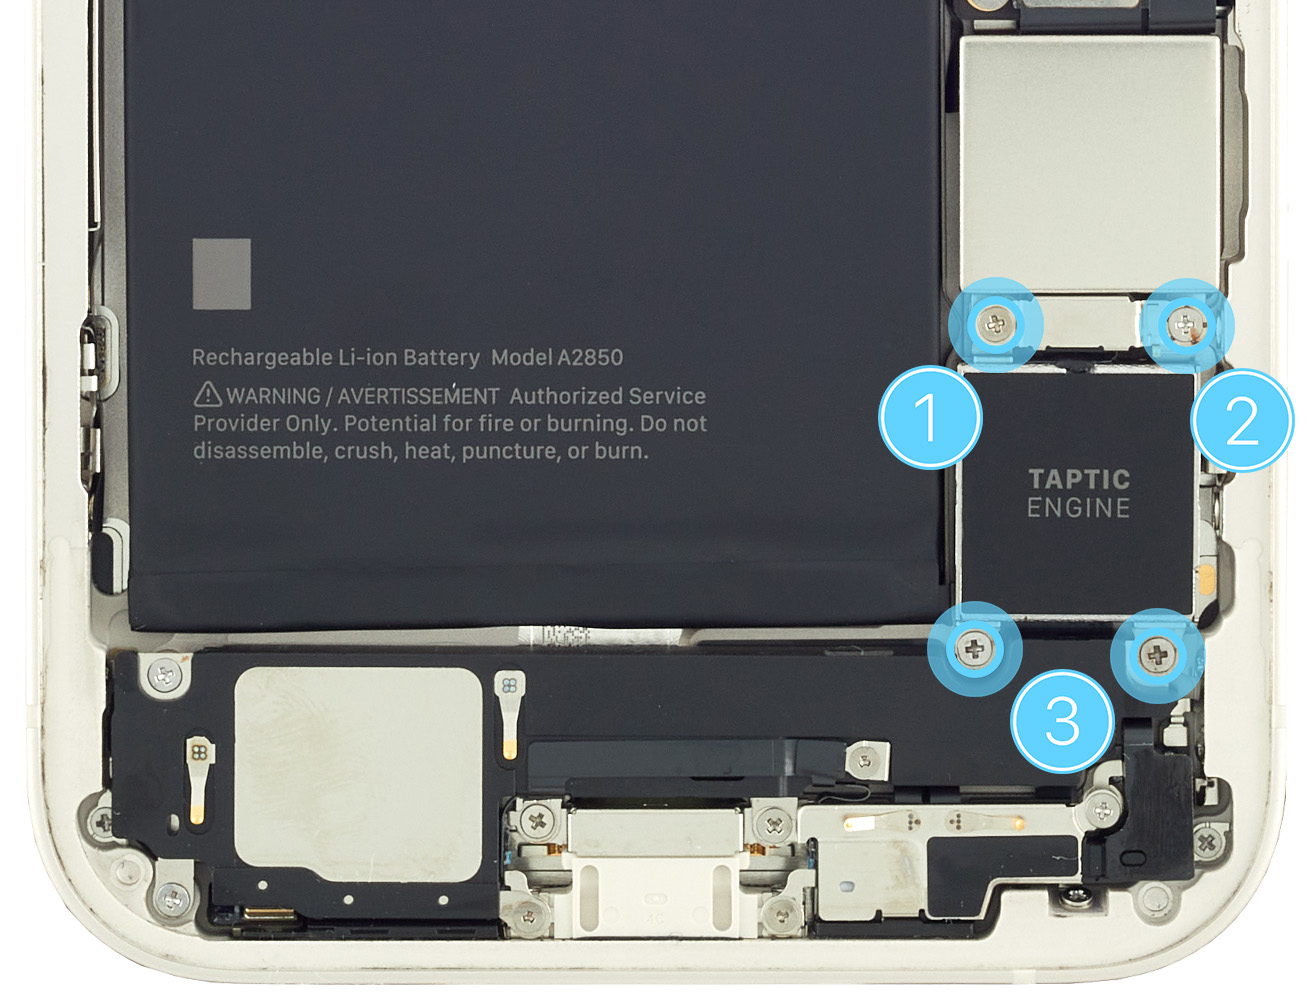
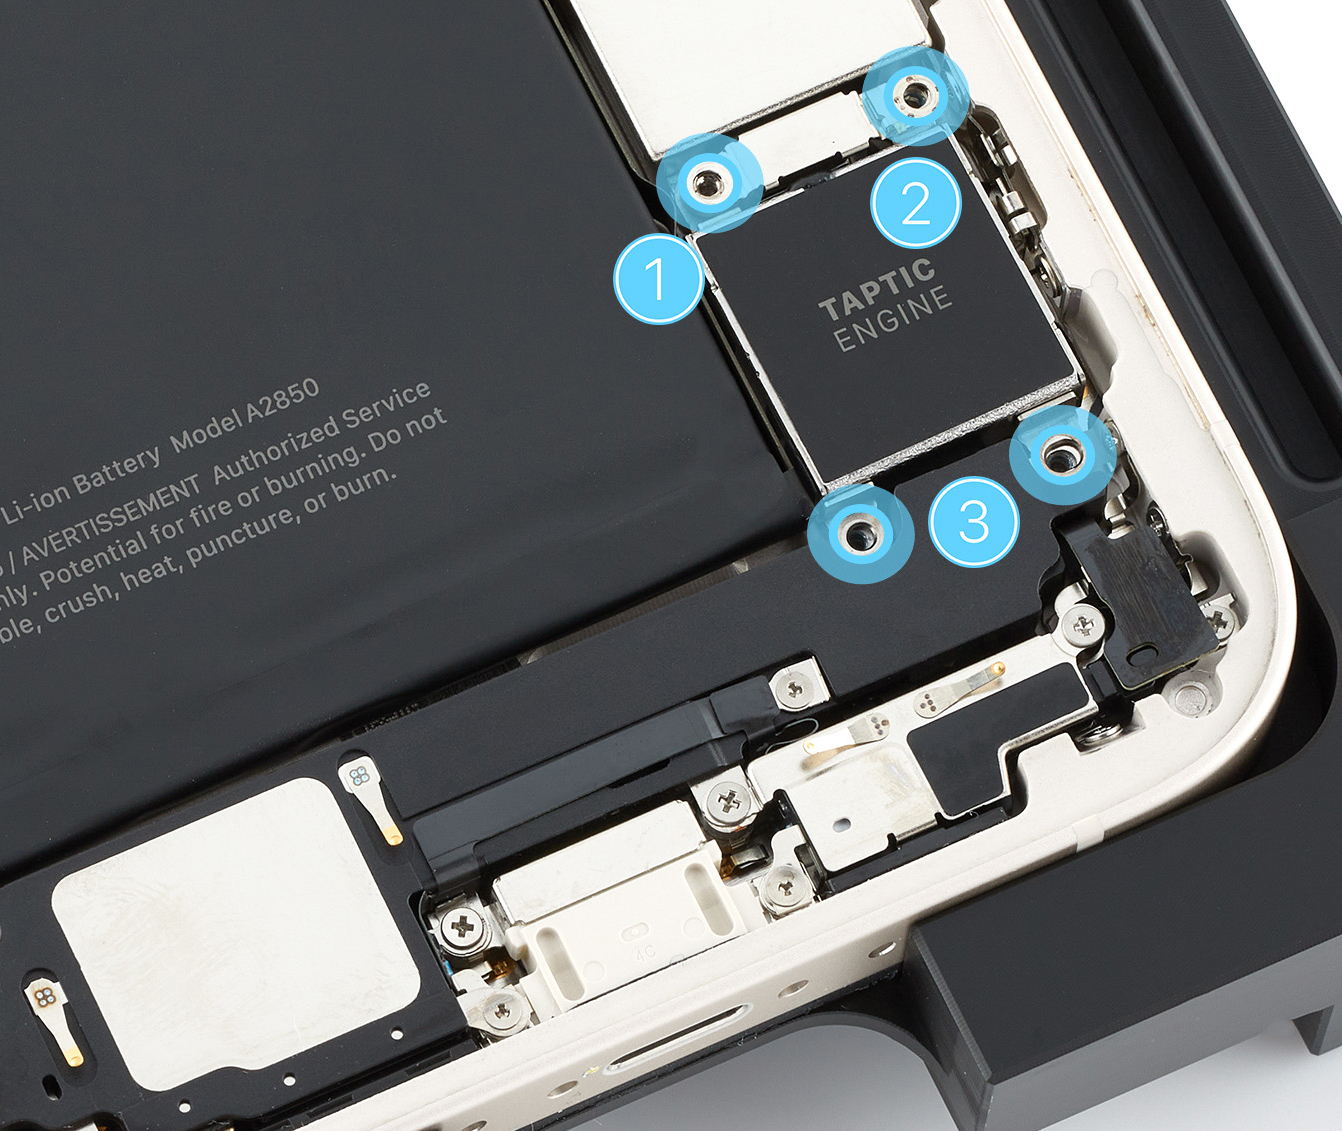
Use a torque driver and the JCIS bit to remove the two crosshead screws (1, 2) from the Taptic Engine connector cowling. Set aside the screws.
-
Remove the Taptic Engine connector cowling and save it for reassembly.
-
Use a torque driver and the JCIS bit to remove the two crosshead screws (3) from the Taptic Engine. Set aside the screws.
-
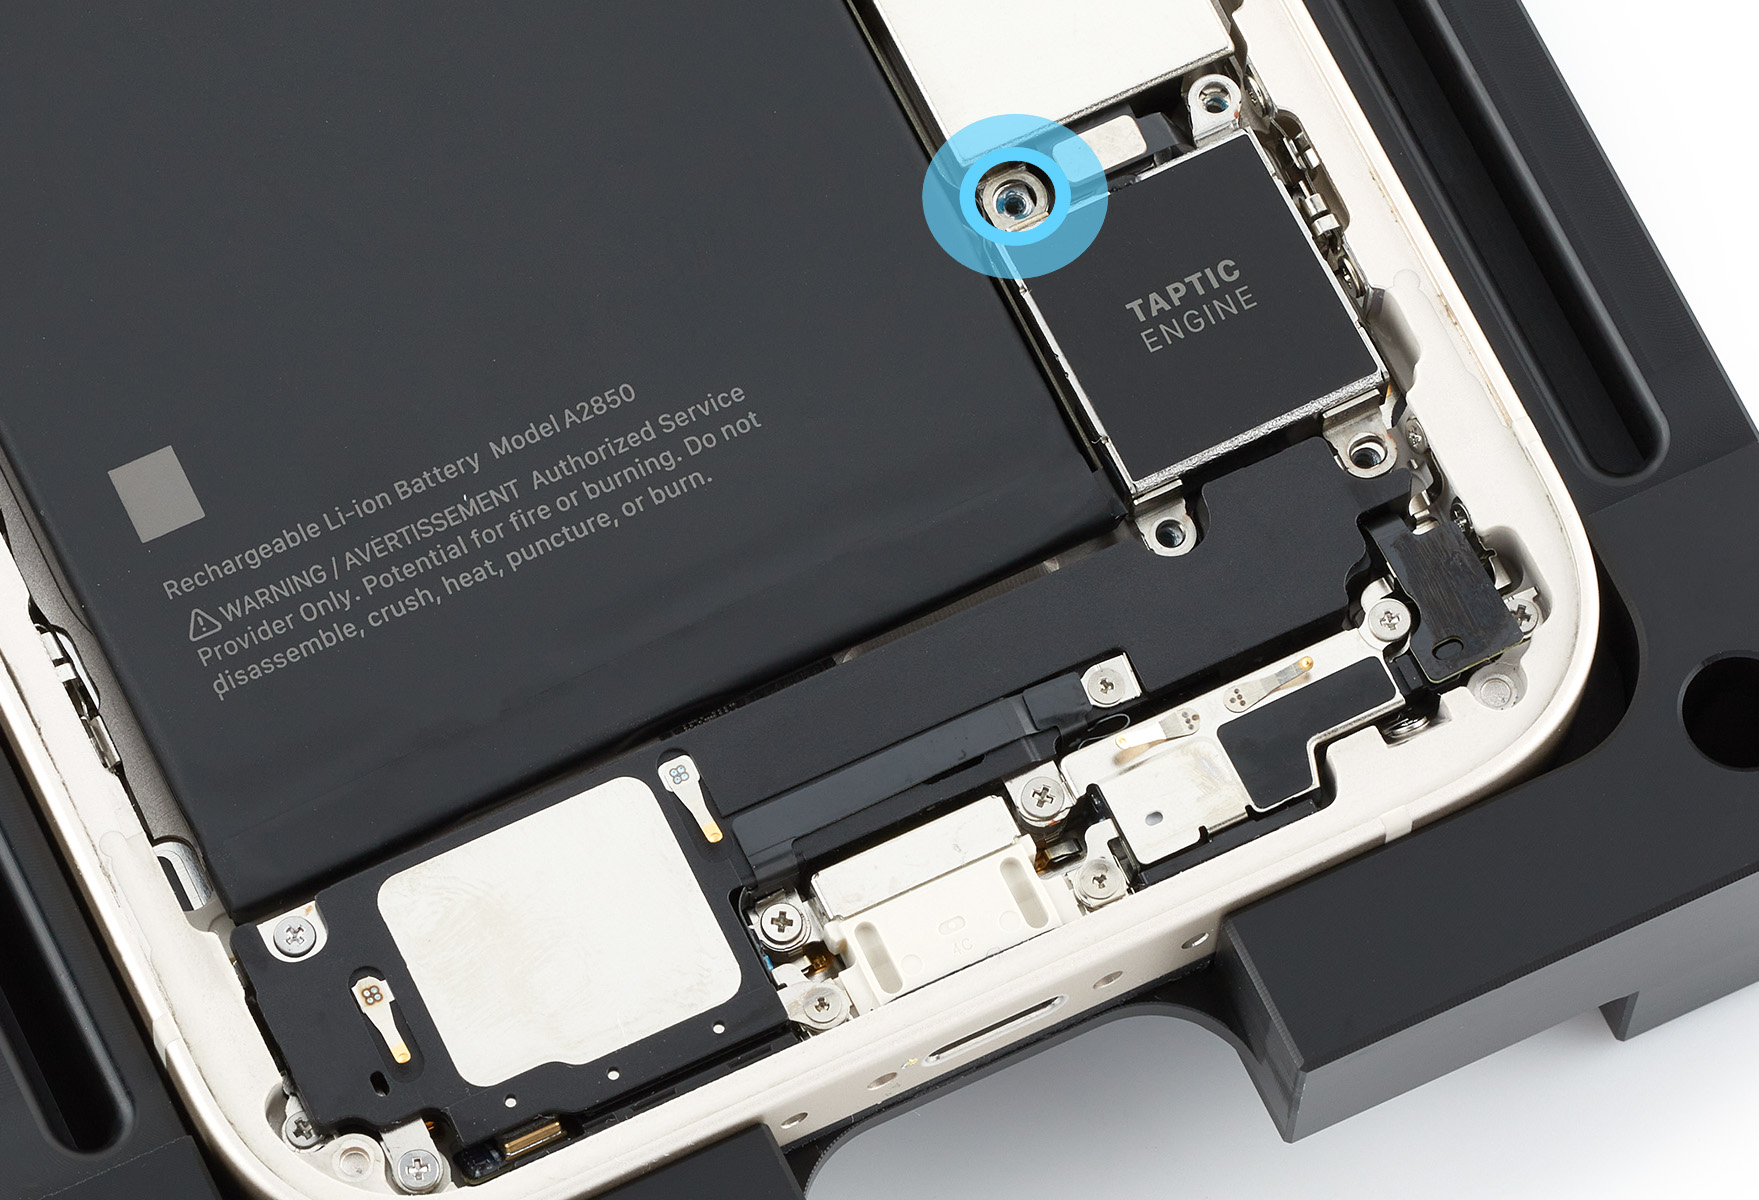
Use a torque driver and the super screw bit to remove the super screw from the Taptic Engine. Set aside the screw.
-
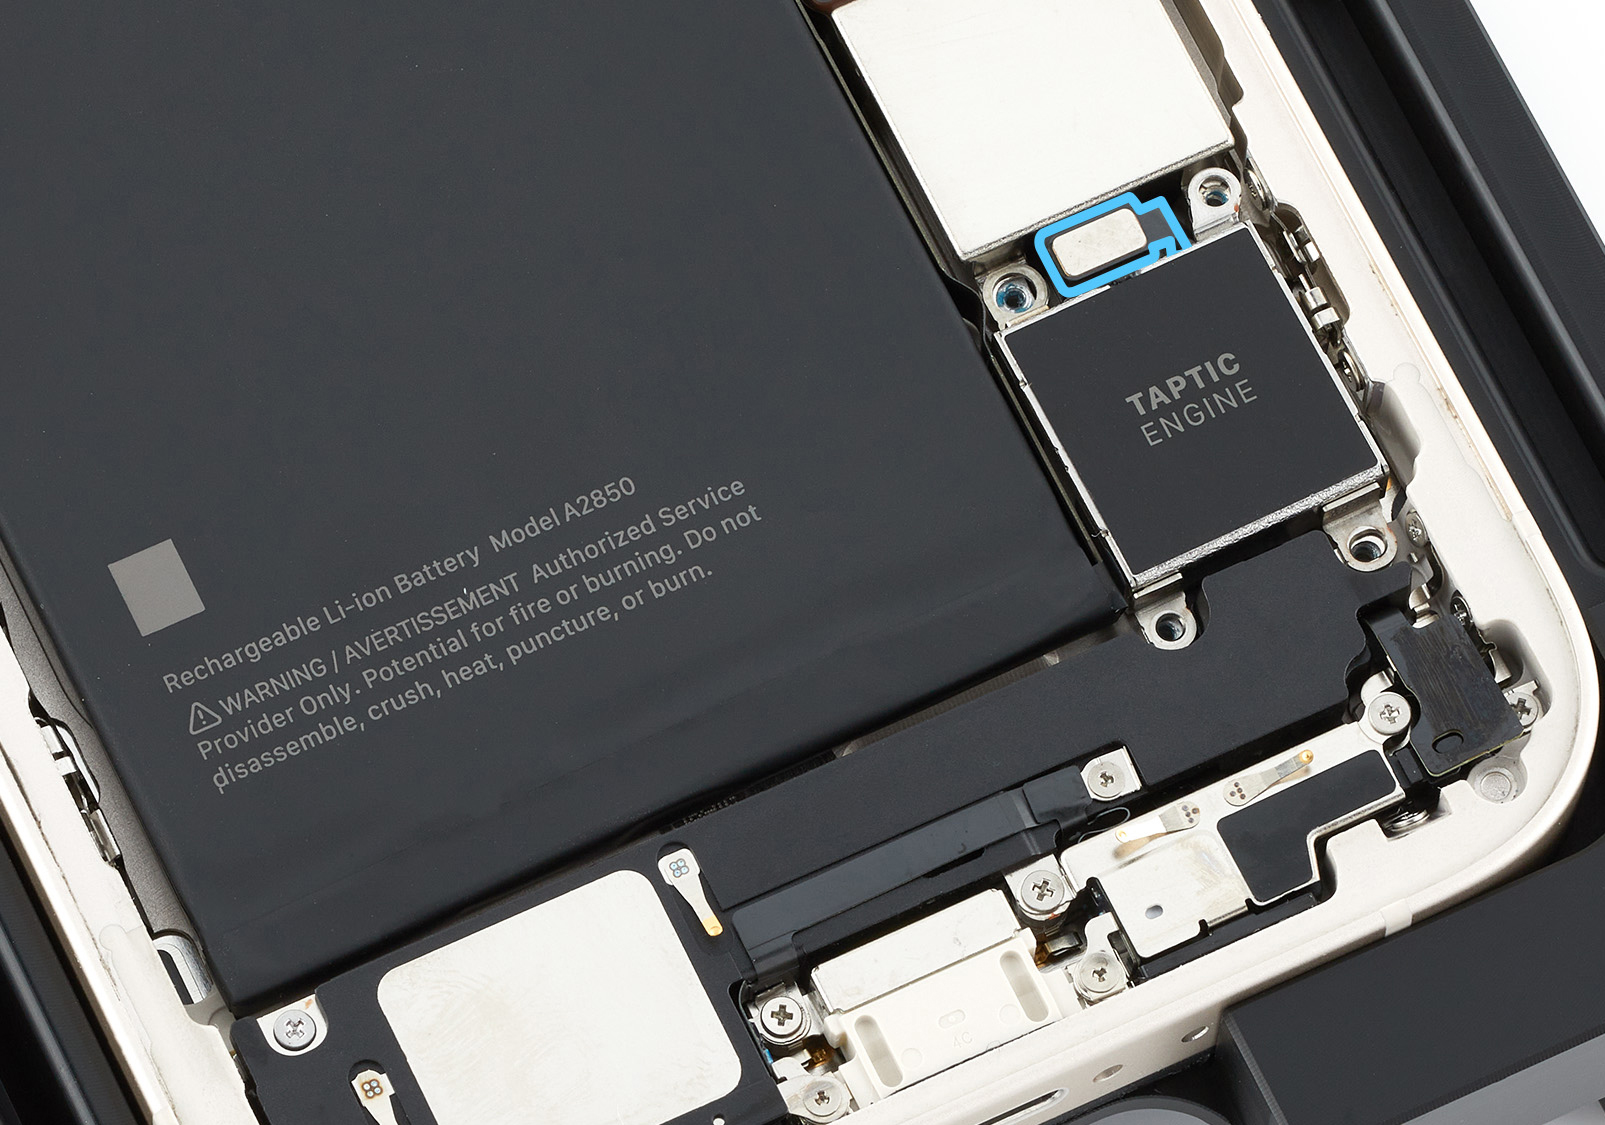
Lift the end of the Taptic Engine flex cable off the connector.
-
Remove the Taptic Engine from the enclosure.
Reassembly
-
Position the Taptic Engine in the enclosure.
-
Press the end of the Taptic Engine flex cable to the connector.
-
Use the teal torque driver and super screw bit to install one new super screw (923-08507) into the Taptic Engine.
-
Position the Taptic Engine connector cowling over the end of the flex cable.
-
Use the blue torque driver and JCIS bit to install one new crosshead screw (923-08505) (1) into the Taptic Engine connector cowling.
-
Use the orange torque driver and JCIS bit to install one new crosshead screw (923-08508) (2) into the Taptic Engine connector cowling.
-
Use the teal torque driver and JCIS bit to install two new crosshead screws (923-08509) (3) into the Taptic Engine.
Reinstall the following part to complete reassembly: