Apple iPhone 15 Plus Bottom Speaker
Before You Begin
Warning
Read Battery Safety and follow workspace and battery handling guidelines before you begin.
Remove the following parts before you begin:
Tools
-
6.7-inch repair tray
-
ESD-safe tweezers
-
JCIS bit
-
Micro stix bit
-
Nylon probe (black stick)
-
Torque driver (blue, 0.65 kgf cm)
-
Torque driver (green, 0.45 kgf cm)
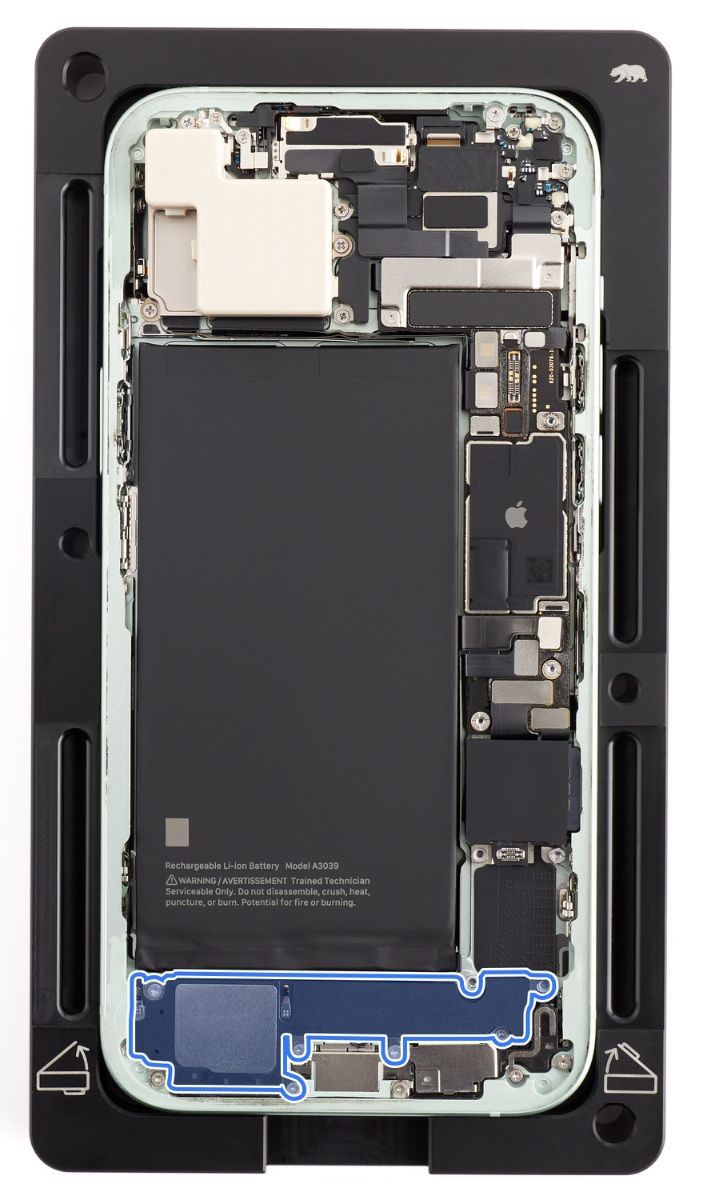
Caution
Avoid touching the grounding springs on and near the bottom speaker.
Removal
-
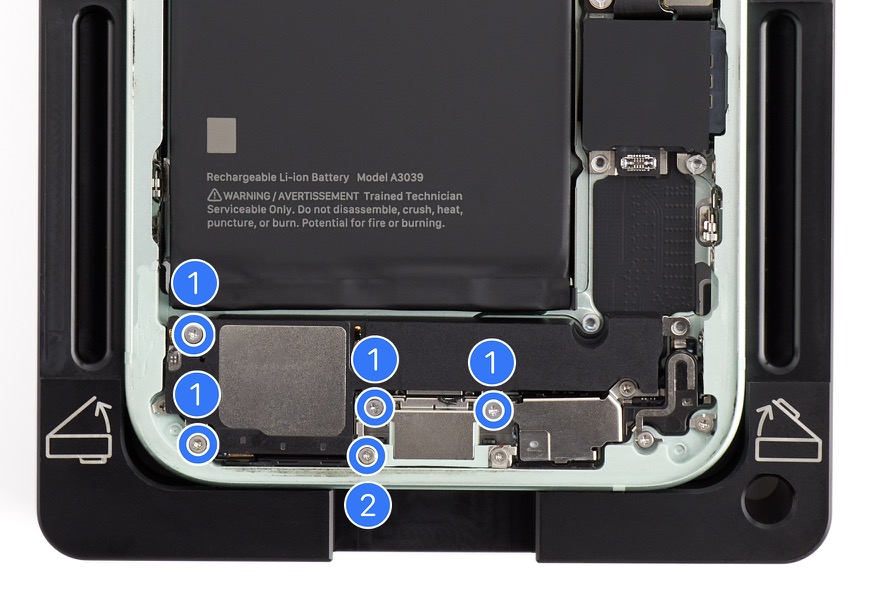
Use a torque driver and the JCIS bit to remove the four crosshead screws (1) from the bottom speaker. Set aside the screws.
-
Use a torque driver and the Micro stix bit to remove the trilobe screw (2) from the bottom speaker. Set aside the screw.
-
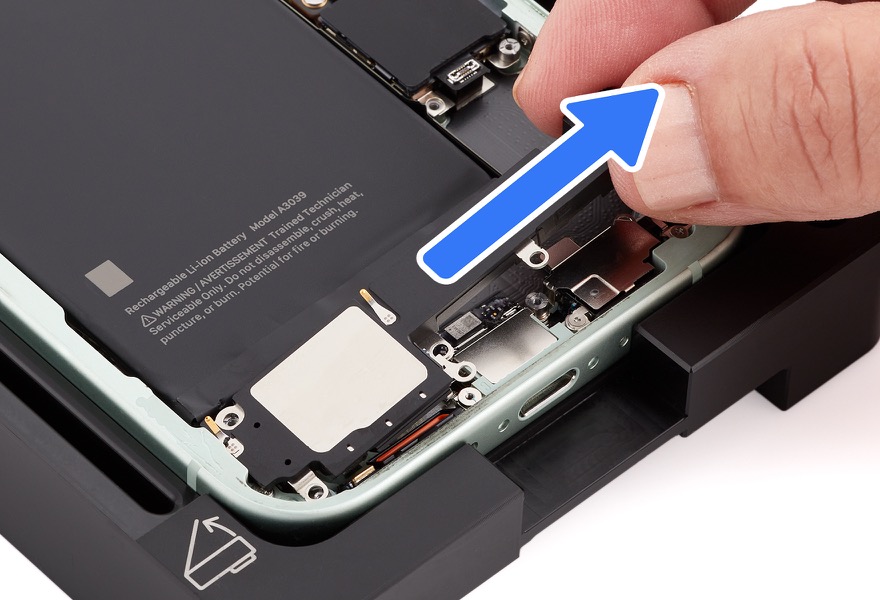
Remove the bottom speaker from the enclosure.
-
Caution: Don’t damage the grounding springs on the bottom speaker.
-
Reassembly
-
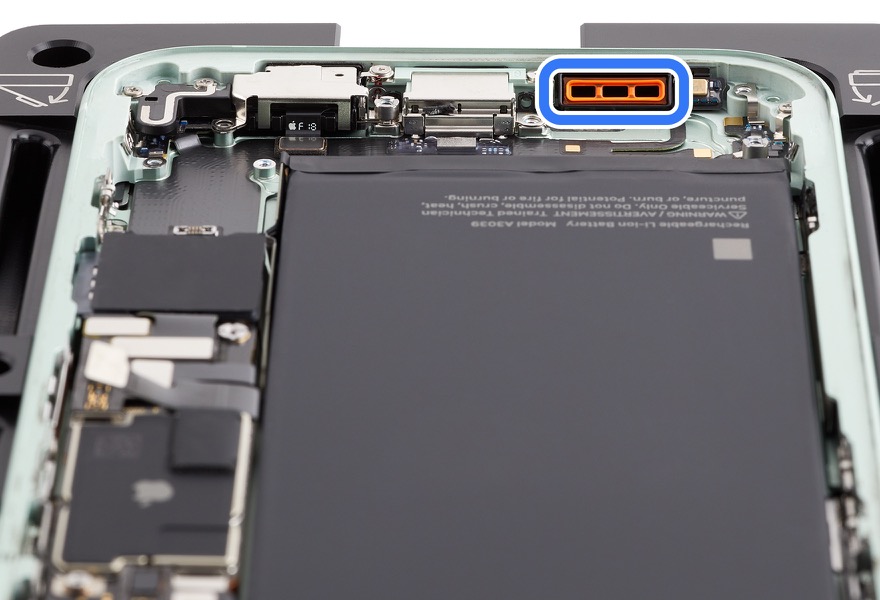
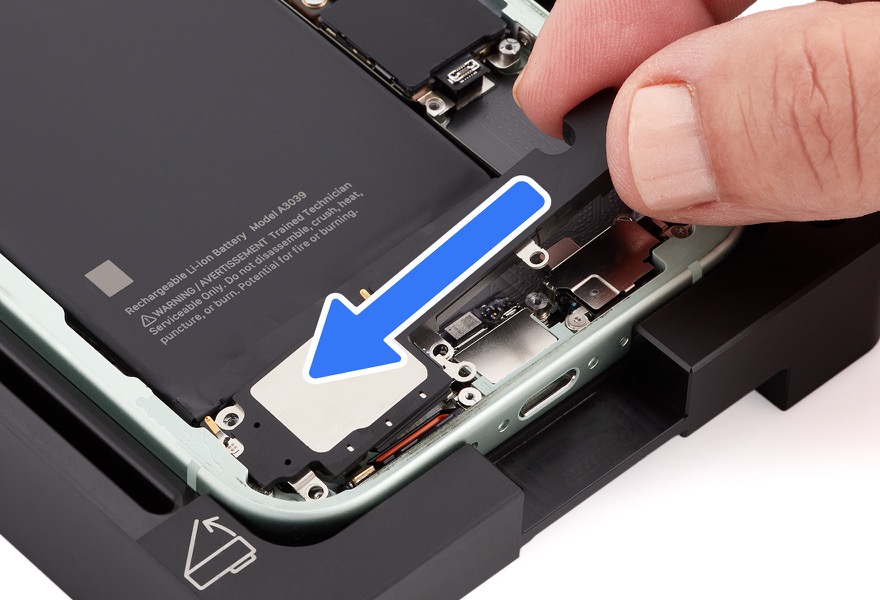
Ensure that the rubber gasket is positioned as shown. If the gasket is out of position, use ESD-safe tweezers to reposition it.
-
Tilt the bottom speaker at a 45-degree angle and position it in the enclosure.
-
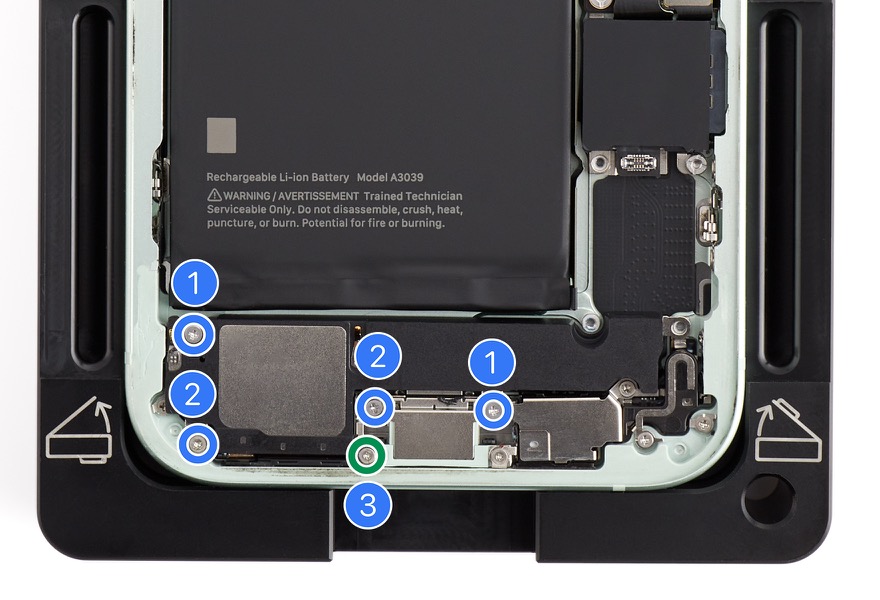
Use the blue torque driver and the JCIS bit to install four new crosshead screws into the bottom speaker:
-
Two crosshead screws (923-09856) (1)
-
Two crosshead screws (923-09857) (2)
-
-
Use the green torque driver and the Micro stix bit to install one new trilobe screw (923-09819) into the bottom speaker (3). Lightly press on the bottom speaker to ensure that the screws are aligned in the screw holes.
-
Caution: Don’t damage the grounding springs on the bottom speaker.
-
Reinstall the following parts to complete reassembly: