Apple iPhone 15 Plus Top Speaker
Before You Begin
Warning
Read Battery Safety and follow workspace and battery handling guidelines before you begin.
Remove the following parts before you begin:
Tools
-
6.7-inch repair tray
-
ESD-safe tweezers
-
JCIS bit
-
Nylon probe (black stick)
-
Torque driver (blue, 0.65 kgf cm)
-
Torque driver (orange, 0.85 kgf cm)
Removal
Important
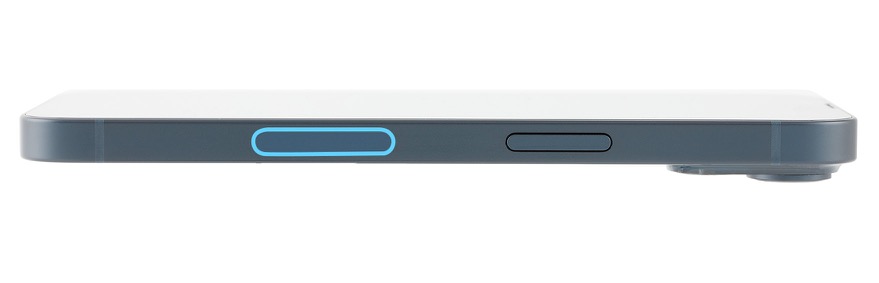
If the iPhone has an mmWave antenna as shown, continue to step 1. If it doesn't, skip to step 2.
-
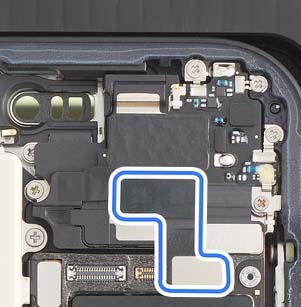
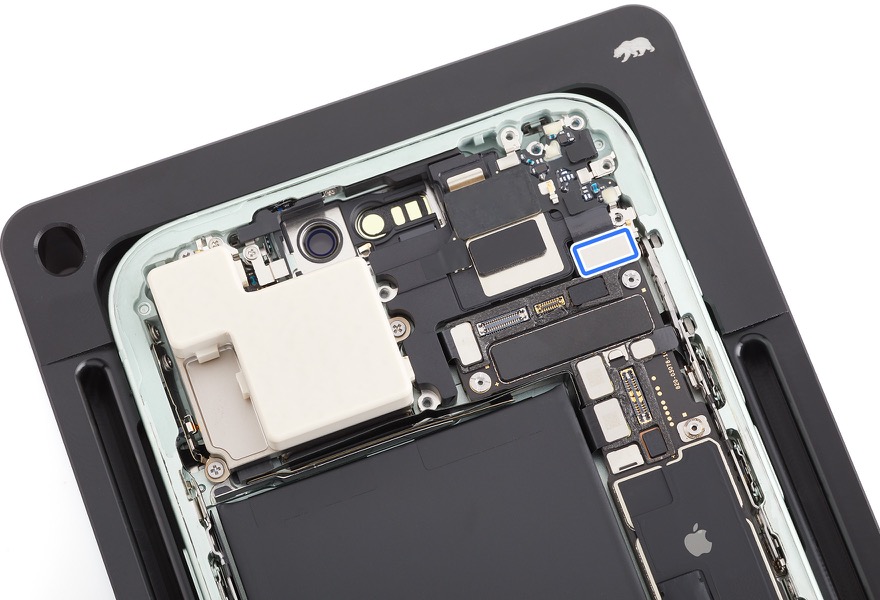
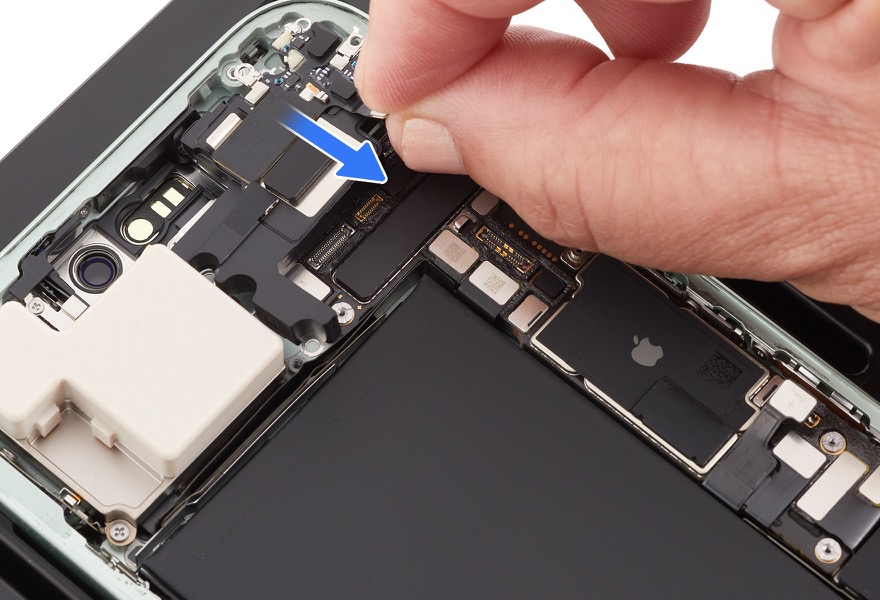
Lift the end of the back glass 2 antenna flex cable and the top speaker flex cable off the connectors. Save the back glass 2 antenna for reassembly.
-
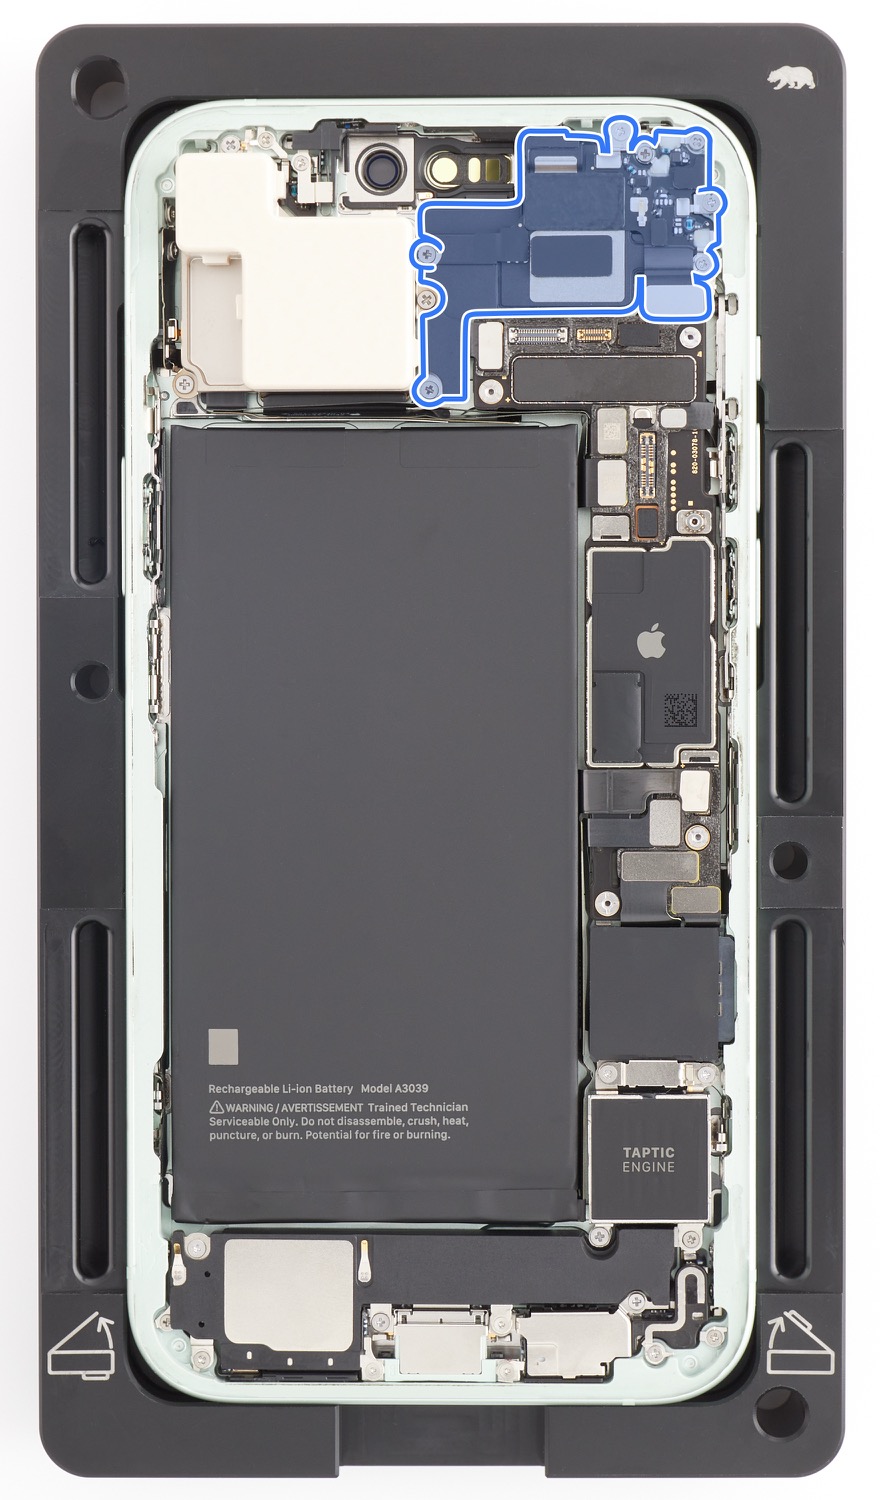
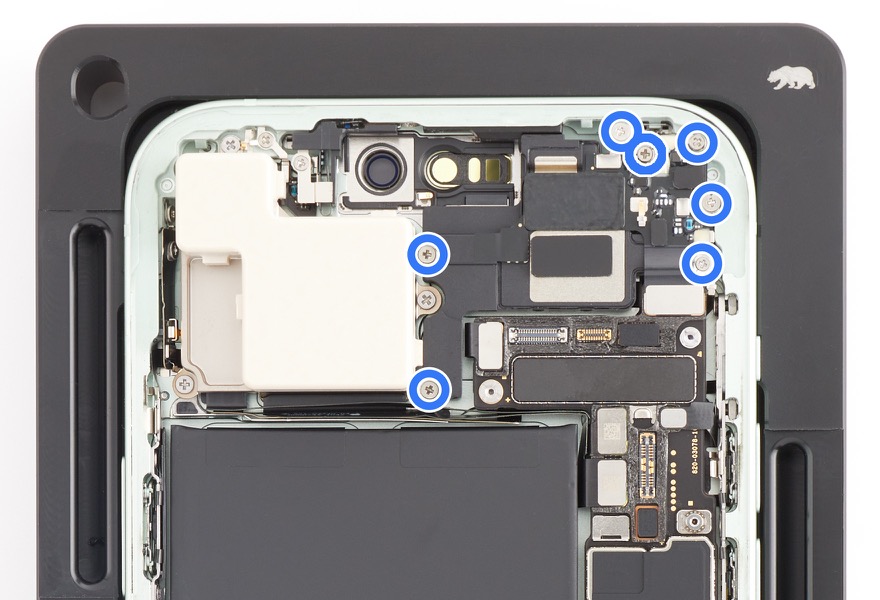
Use a torque driver and the JCIS bit to remove the seven crosshead screws from the top speaker.
-
Remove the top speaker from the enclosure.
Reassembly
-
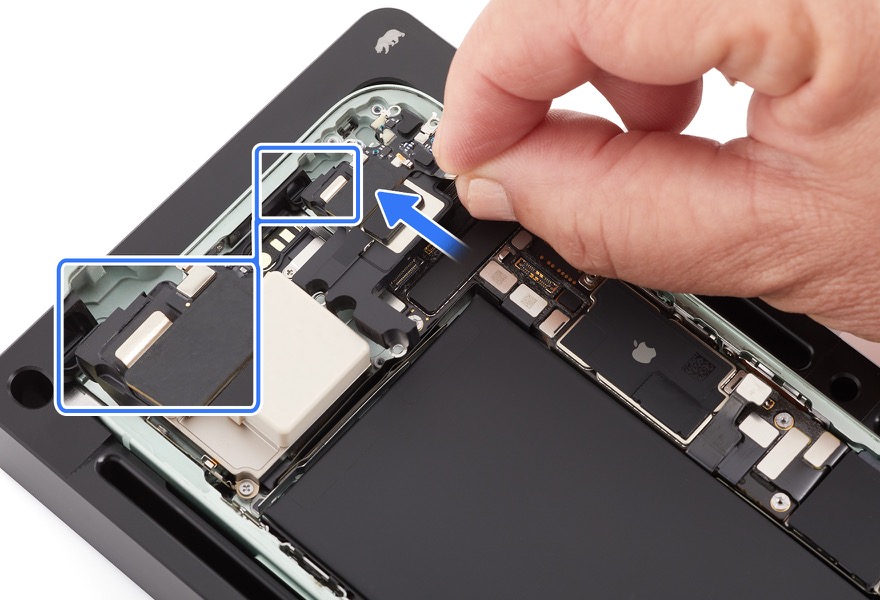
Position the top speaker in the enclosure and align the gasket with the indentation.
-
Press the end of the top speaker flex cable to the connector.
-
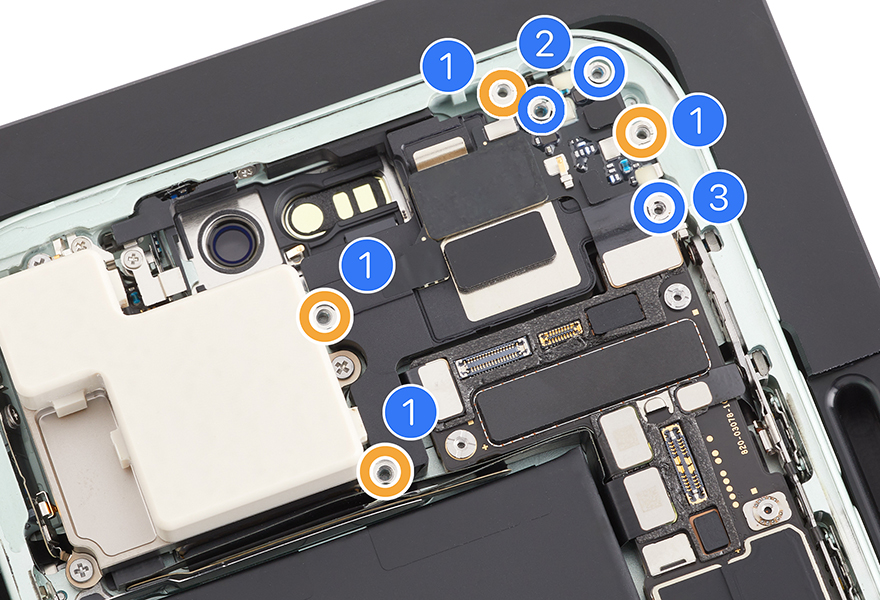
Use the orange torque driver and the JCIS bit to install four new crosshead screws (923-09846) into the top speaker (1).
-
Use the blue torque driver and the JCIS bit to install three new crosshead screws into the top speaker:
-
Two crosshead (923-09847) (2)
-
One crosshead (923-09848) (3)
-
-
If the iPhone has a mmWave antenna, position the back glass 2 antenna in place and press the end of the antenna flex cable to the connector.
-
Important: If the back glass 2 antenna is lost or damaged, replace it with a new one.
-
Reinstall the following parts to complete reassembly: