Apple iPhone 16 Pro Main Microphone
Before You Begin
Warning
Read Battery Safety and follow workspace and battery handling guidelines before you begin.
Remove the following parts before you begin:
Tools
-
Torque driver (orange, 0.85 kgf cm) (923-08131)
-
Torque driver (green, 0.45 kgf cm) (923-00105)
-
Micro stix bit (923-01290)
-
Super screw bit (923-02066)
-
ESD-safe tweezers
-
Nylon probe (black stick) (922-5065)
-
Ethanol wipes or isopropyl alcohol (IPA) wipes
Refer to a full list of tools required for all repairs.
Removal
Note: If you’ve already completed the removal steps, skip to reassembly.
-
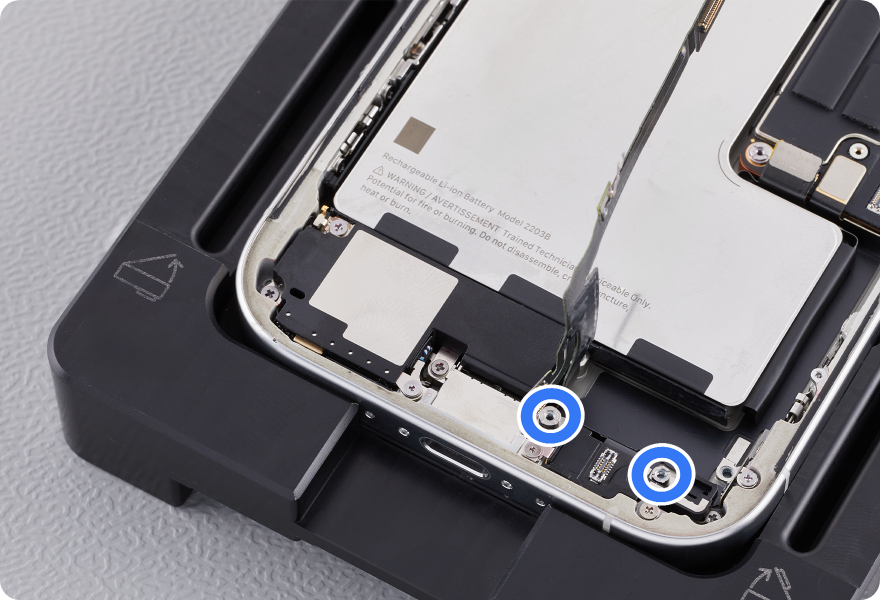
Use a torque driver and the super screw bit to remove two super screws from the main microphone. Set aside the screws.
-
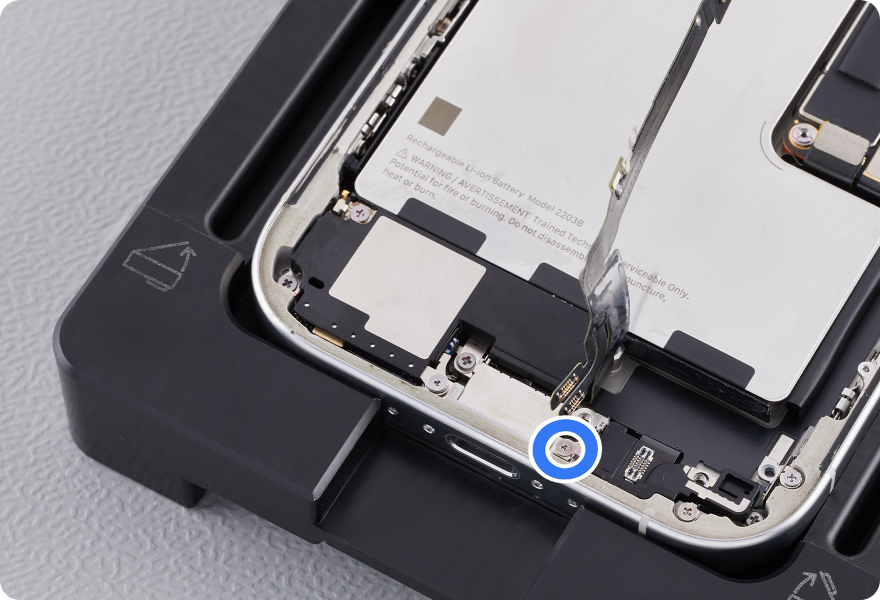
Use a torque driver and the Micro stix bit to remove one trilobe screw. Set aside the screw.
-
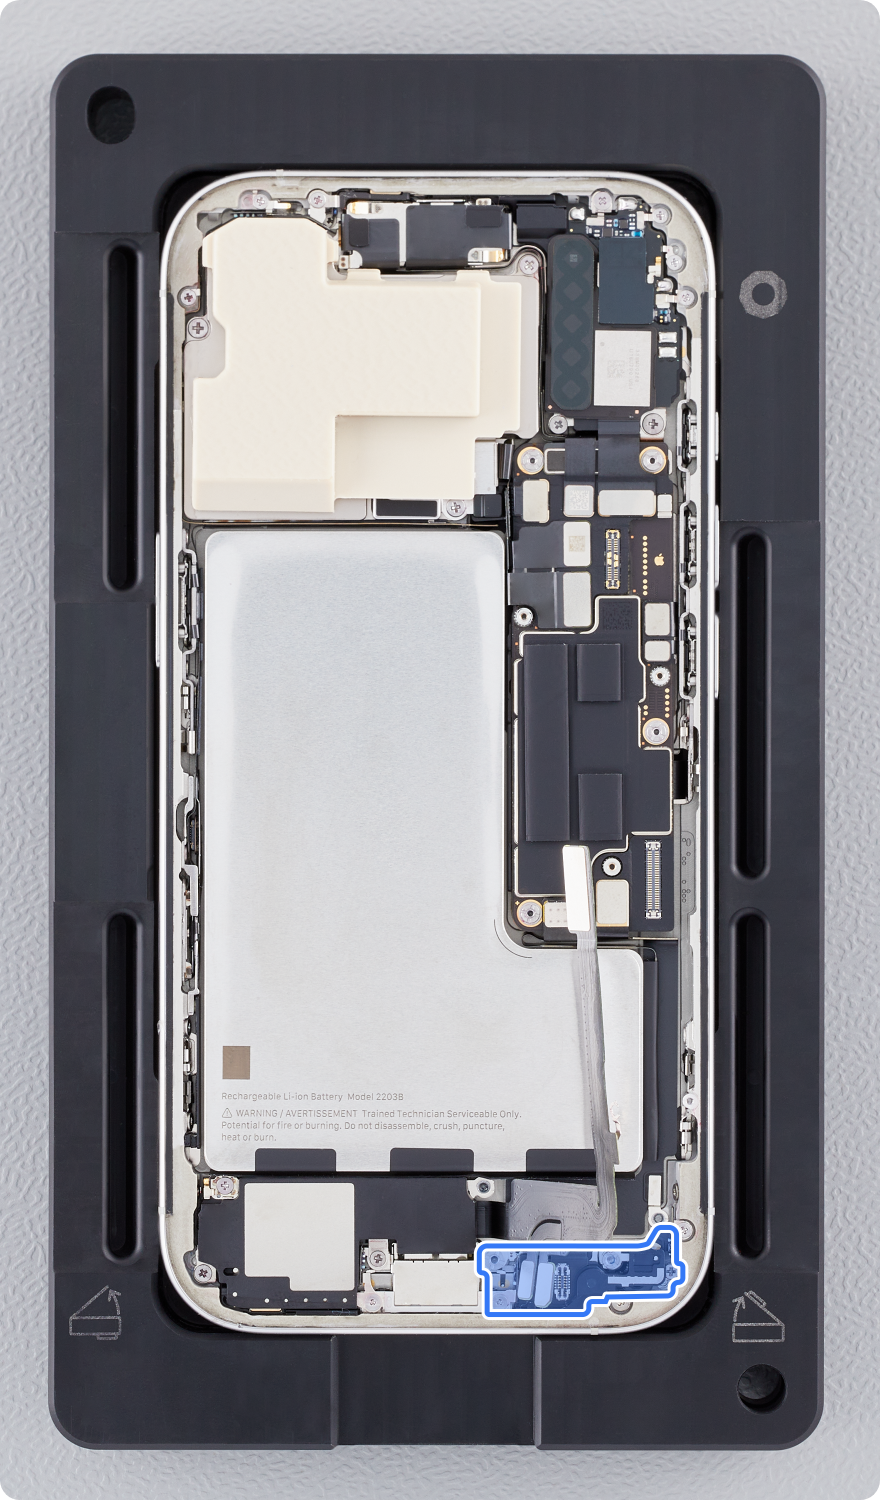
Remove the main microphone from the enclosure.
Important: The main microphone is held in place by strong adhesive. Pull the main microphone toward the top of the enclosure until the microphone separates from the adhesive.
Reassembly
-
Use the ESD-safe tweezers to remove all adhesive from the enclosure. Clean the area with an ethanol wipe or IPA wipe.

-
Use ESD-safe tweezers to peel the protective liner from the adhesive on the main microphone.
-
Position the main microphone in the enclosure.
-
Press and hold the top of the main microphone for 15 seconds to ensure that it adheres to the enclosure.

-
Use the orange torque driver and the super screw bit to install two new super screws into the main microphone:
-
One super screw (923-11138) (1)
-
One super screw (923-11139) (2)

-
-
Use the green torque driver and the Micro stix bit to install one new trilobe screw (923-11943) (3).
Reinstall the following parts to complete reassembly: