Apple iPhone 17 Pro Top Speaker
Before You Begin
Warning
Read Battery Safety and follow workspace and battery handling guidelines before you begin.
Remove the following parts before you begin:
Tools
-
Adjustable torque driver (10–34 Ncm)
-
Crosshead 50 mm bit
-
ESD-safe tweezers
-
Nylon probe (black stick)
Refer to a full list of tools required for all repairs.

Removal
Note: If you’ve already completed the removal steps, skip to reassembly.
-
Use the adjustable torque driver and crosshead bit to remove three crosshead screws from the top speaker.

-
Lift the top speaker out of the enclosure.

Reassembly
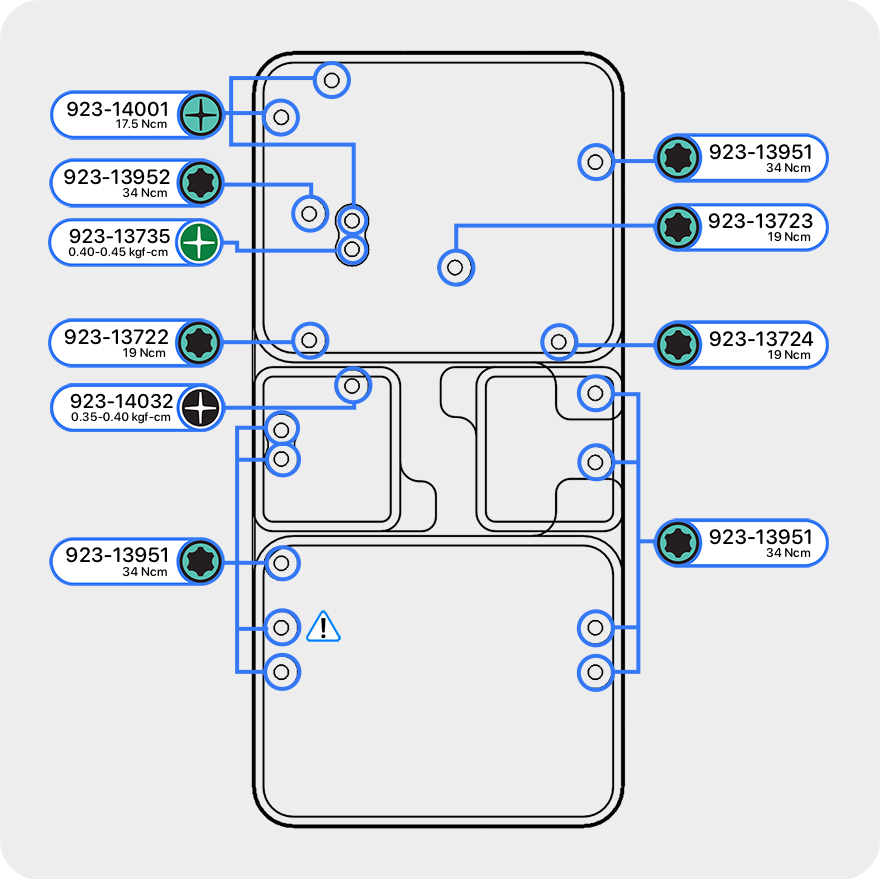
Screw Diagram
-
Caution: The screw tray is the same for eSIM and pSIM models. One screw (923-13951) labeled with the caution icon is not used for pSIM models.
-
Important: 923-14032 may be a crosshead screw or a trilobe screw. Use the appropriate bit for the screw that's included in the screw tray.
Caution: Don't damage the springs on the speaker. If the springs are damaged, you'll need to replace the top speaker.

-
Position the top speaker in the enclosure at an angle as shown. Then lower it into the enclosure.
-
Caution: Ensure that the speaker gasket is fully aligned with the indentation in the enclosure.

-
-
Set the torque value on the 10–34 Ncm adjustable torque driver to 17.5 Ncm. Use the adjustable torque driver and crosshead bit to install three new crosshead screws (923-14001) into the top speaker.

Reinstall the following parts to complete reassembly: